First you need to configure the Sending Domain
Step 1: Go to https://app.sparkpost.com/dashboard, register if you are new user or else login.
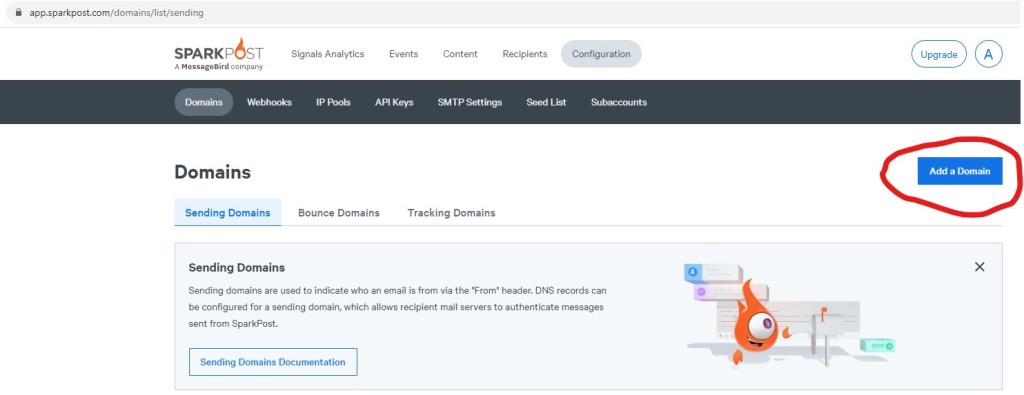
Step 2: Click on Configuration.

Step 3: Click on Add a domain.
Step 4: Type the domain you want to use to send mails to users and click Save and Continue.
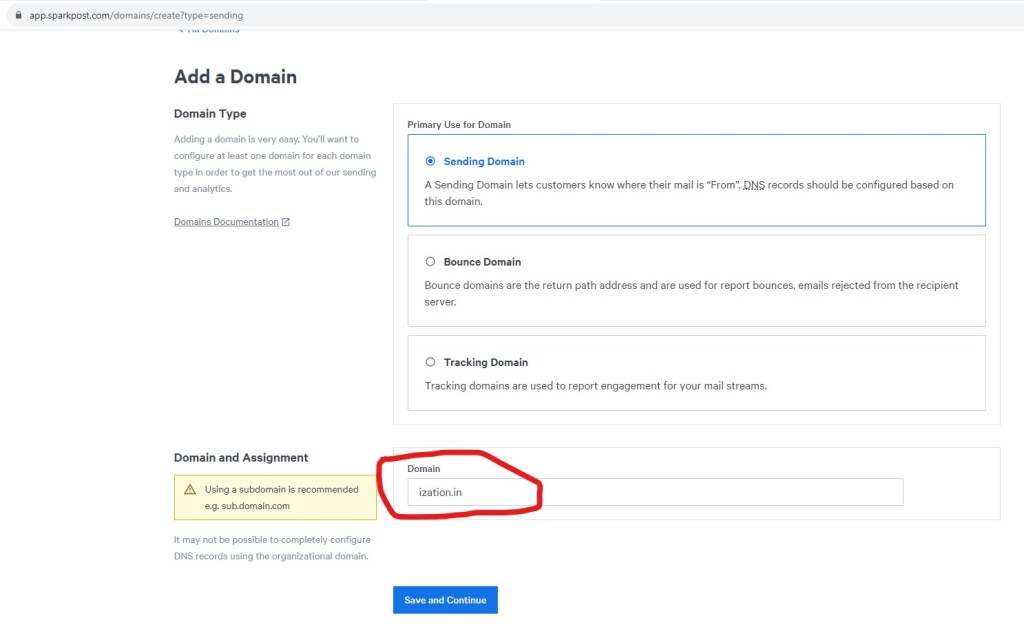
Step 5: Click Save and Continue.
Step 6: Now you need to verify this Domain in your DNS.
Step 7: Once the Domain is verified, you can create API key for the domain.
Step 8: Click on API keys.

Step 9: Click on Create API Key.

Step 10: Write down the name of the API Key in API Key Name.
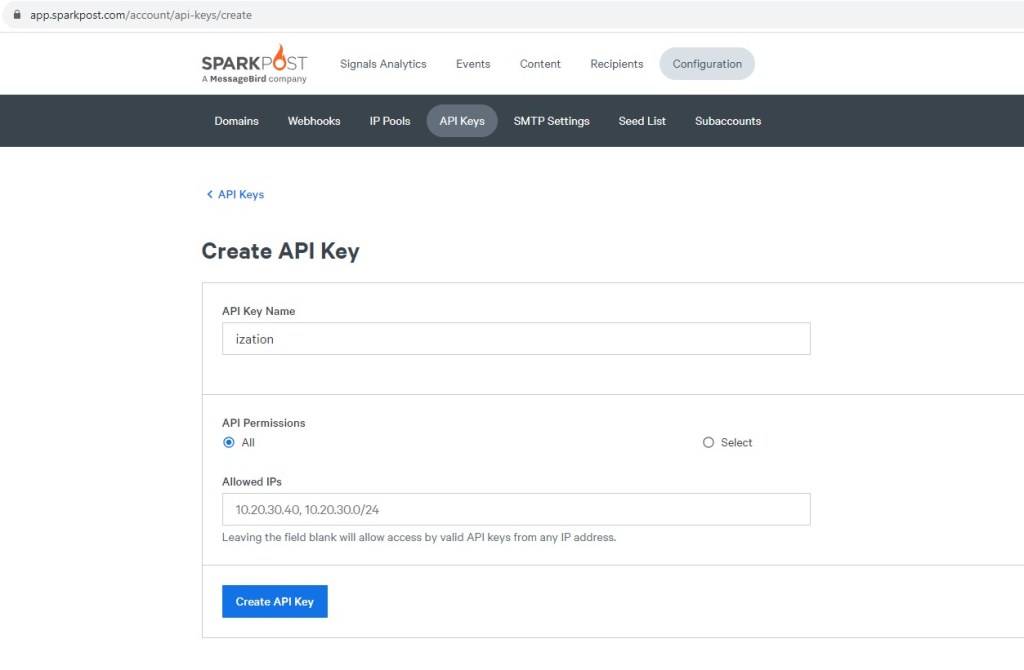
Step 11: Click on Create API Key.
Step 12: API key will be generated and will be shown on the screen. Copy and save the API Key for future use.
Now you are ready to send the mails.
Step 13: Launch Azure Data Factory.
Step 14: Create a new pipeline.
Step 15: Drag and Drop Web Activity from Activities section to the Canvas.

Step 16: Go to settings section of this activity.
Step 17: Enter the following values:
URL: https://api.sparkpost.com/api/v1/transmissions?num_rcpt_errors=5
Method: POST
Body:
{
  "campaign_id": "Auto Generated Email Check",
  "recipients": [
   {
      "address": " Recipient Email Address"
    }
  ],
  "content": {
    "from": {
      "email": " Sender Email Address"
    },

    "subject": "Mail Subject",
     "html": "<html><head><style>body { background-color: white; text-align: left; color: black; font-size: 12px; font-family: Arial, Helvetica, sans-serif;}</style></head><body><b> This is testing</b></br><P>Ization/p></body></html>"
  }
}
Authentication: None
Headers:
Content-Type: application/json
Accept: application/json
Authorization: Put the API Key you generated from SparkPost.
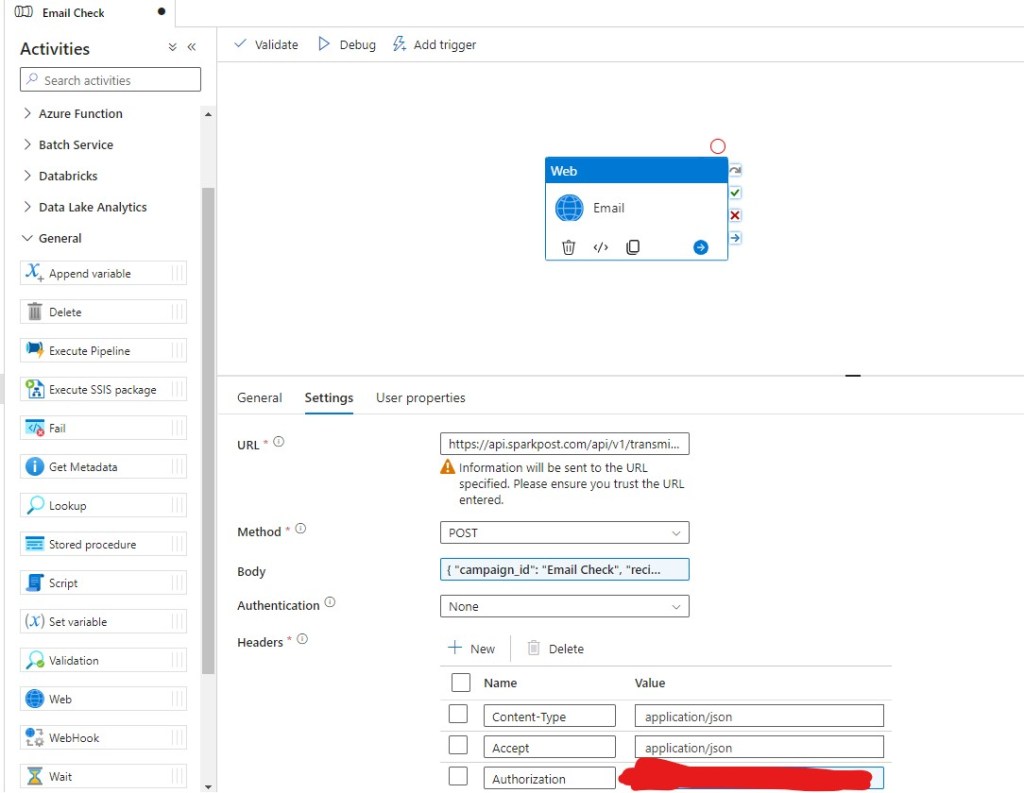
Step 18: Click Debug.
Ready to elevate your skills? Click here for my Python book and here for my Machine Learning book on Kindle.

Leave a comment