With Azure Data Factory, copying files from SharePoint to Data Lake becomes a breeze. By leveraging Azure Data Factory’s intuitive interface and robust features, you can easily set up connections to your SharePoint environment and Data Lake Storage Gen2. This allows you to define datasets representing the source (SharePoint) and the sink (Data Lake), specifying the exact locations from which data will be extracted and where it will be stored.
Let’s see how can we Copy Multiple Files from a SharePoint Folder to Datalake using Azure Data factory.
You need to do this task in three phases.
Phase 1: Setting up an app-only principal
You need to create a principal which can access the SharePoint folder.
You can do that by following the steps below:
Step 1: Go to your SharePoint site.

Step 2: Add ‘ /_layouts/15/appregnew.aspx ’ to the URL and click enter.

It would take you to another page, like the one shown below:
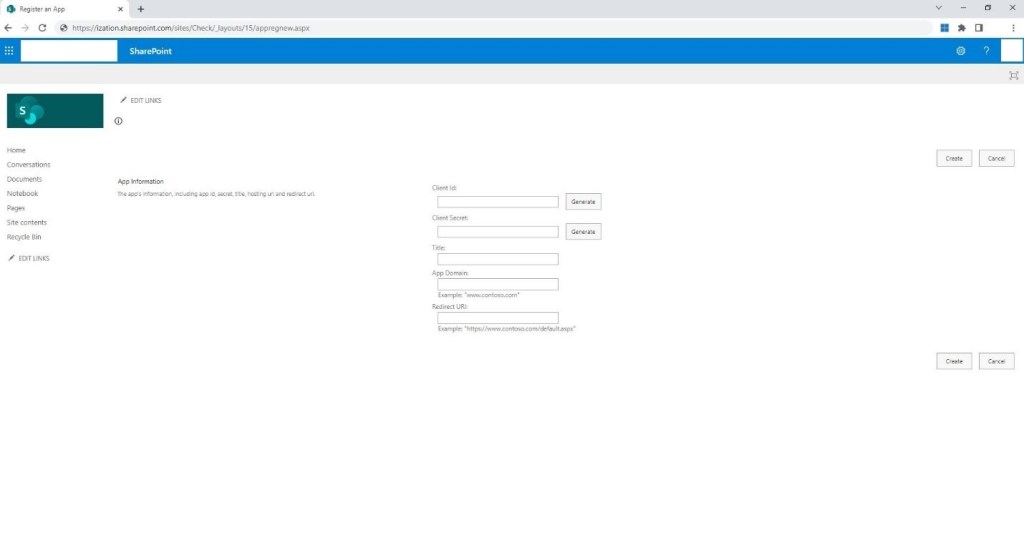
Step 3: Click on Generate Client Id, Generate Client Secret and type the required details in the text boxes provided below:
Title
App Domain
Redirect URI

Step 4: Click on Create.

Step 5: Copy the Client ID and Secret and keep them handy. Click on Ok.
Now that app has been created, let’s move to Phase 2.
Phase 2: Granting permissions to the newly created principal.
You need to be owner or member of the SharePoint site to grant permission.
Step 1: Paste the URL ‘https://CompanyName.sharepoint.com/sites/SiteName/_layouts/15/appinv.aspx’ in your browser and click enter.
Example: https://ization.sharepoint.com/sites/Check/_layouts/15/appinv.aspx

Step 2: Add the Client Id of the principal you created in phase 1 and click look up. Details of your principal should appear in the text boxes below.
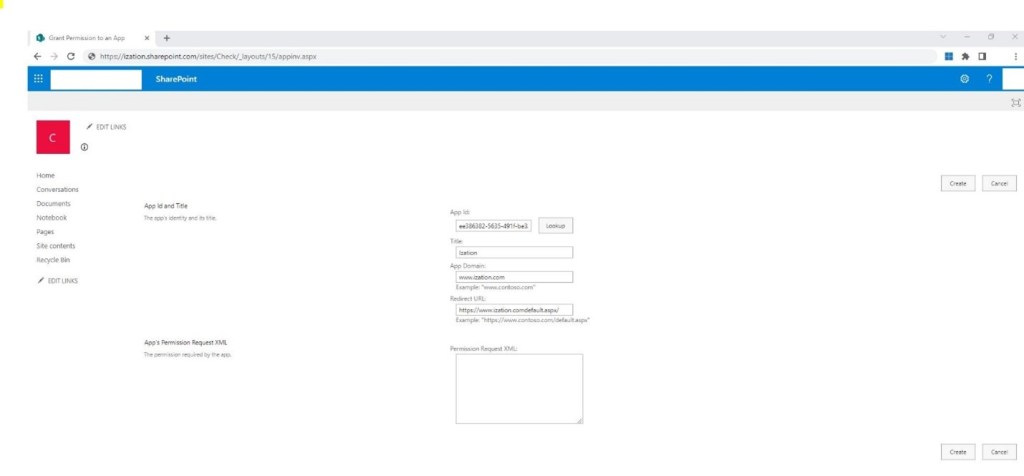
Step 3: Paste the below XML code in the Text box named Permission Request XML: and click Create.
<AppPermissionRequests AllowAppOnlyPolicy="true">
<AppPermissionRequest
Scope="http://sharepoint/content/sitecollection"
Right="Read"/>
</AppPermissionRequests>
Step 4: You’ll be presented with a permission consent dialogue. Click Trust It to grant the permissions:

Now your principal is ready to be used in Azure Data Factory. We can move to Phase 3 now.
Phase 3: Setting up Pipeline in Azure Data Factory
Step 1: Go to Azure Data Factory
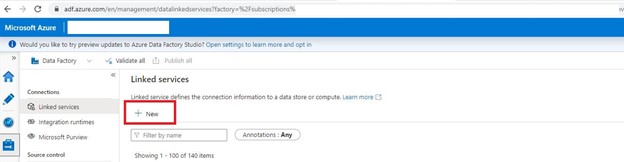
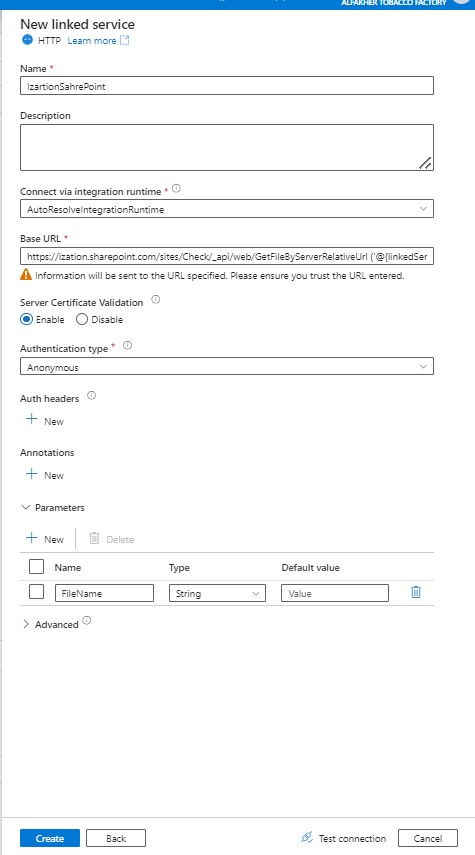
Step 2: Creating Linked service for SharePoint. Go to Mange page and click Linked services. Click on New.
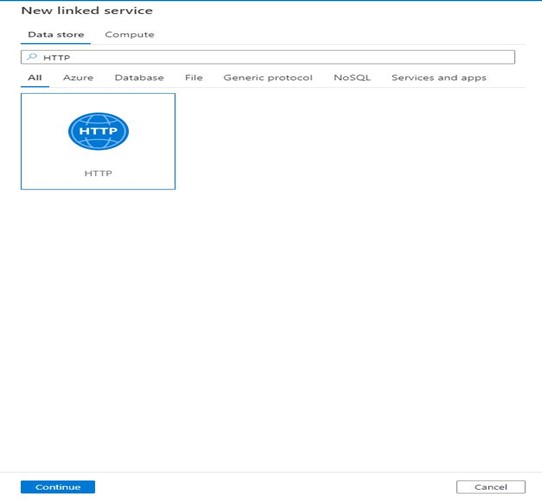
Step 3: Search for HTTP, select it and click Continue.
Step 4: Fill the name of the linked service, Provide the URL of the SharePoint file, choose Authentication Type as Anonymous and click Create.
URL example: https://Ization.sharepoint.com/sites/Check/_api/web/GetFileByServerRelativeUrl (‘@{linkedService().FileName}’)/$value
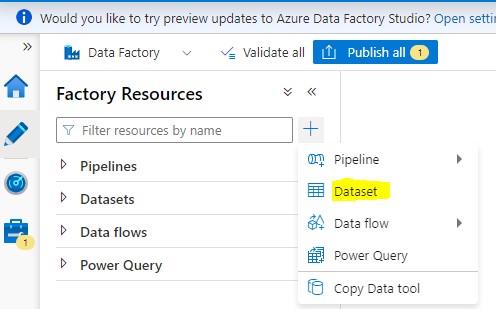
Step 5: Creating Dataset for SharePoint. Go to Author section of Azure Data factory and click the + sign, then select Dataset.
Step 6: Search for HTTP, select it and click Continue.
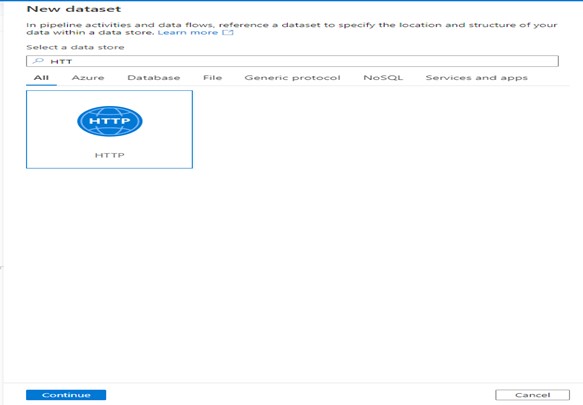
Step 7: Select Binary format and click Continue.

Step 8: Set the name of the Dataset, select the linked service from Dropdown and Click OK.

Step 9: Now, Open the Dataset you created and click on Parameter.
Step 10: Click New and add a parameter of Type String. e.g. RelativeURL

Now let’s create the linked service and Dataset for Datalake Gen2.
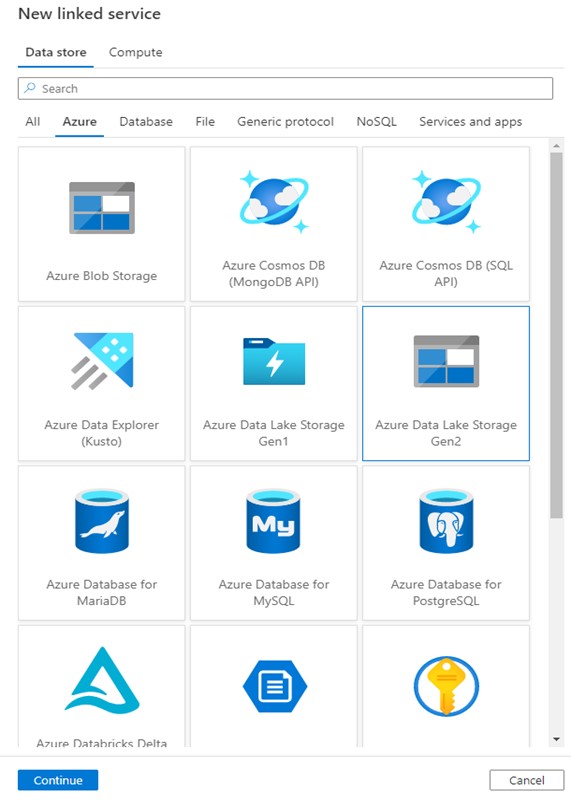
Step 11: Go to Mange page and click Linked services. Click on New.

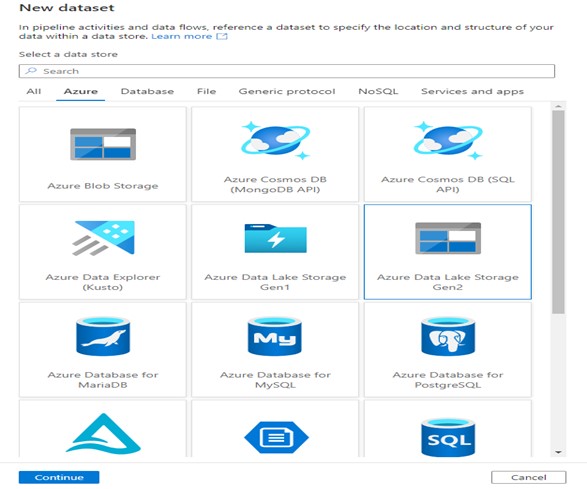
Step 12: Search and select Azure Data Lake Storage Gen2 and click Continue.
Step 13: Fill in the details and click Create.

Step 14: Go to Author section of Azure Data factory and click the + sign, then select Dataset.

Step 15: Search and select Azure Data Lake Storage Gen2 and click Continue.
Step 16: Select Binary format and click Continue.

Step 17: Set the name of the Dataset, select the linked service from Dropdown, provide the File path and click OK.

Step 18: Now, Open the Dataset ‘AzureStorage’ and Click on Parameter.
Step 19: Click New and add below parameters of Type String:
- StorageAccountFolder
- StorageAccountSubFolder
- FileNames

Next Step: Creating Variables for the pipeline.
Step 20: Click on Variables.
Step 21: Click on New and add the below variables of Type String:
- ClientID
- ClientSecret

Next step is to create the Pipeline.
Step 22: Go to Author section of Azure Data factory and click the + sign, then select Pipeline and click Pipeline.

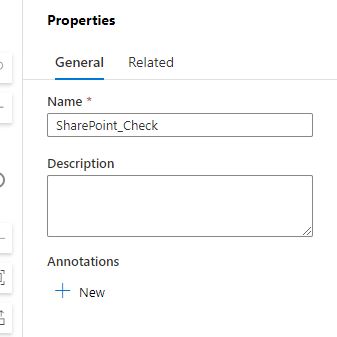
Step 23: Set the name of the pipeline in the Properties Window.
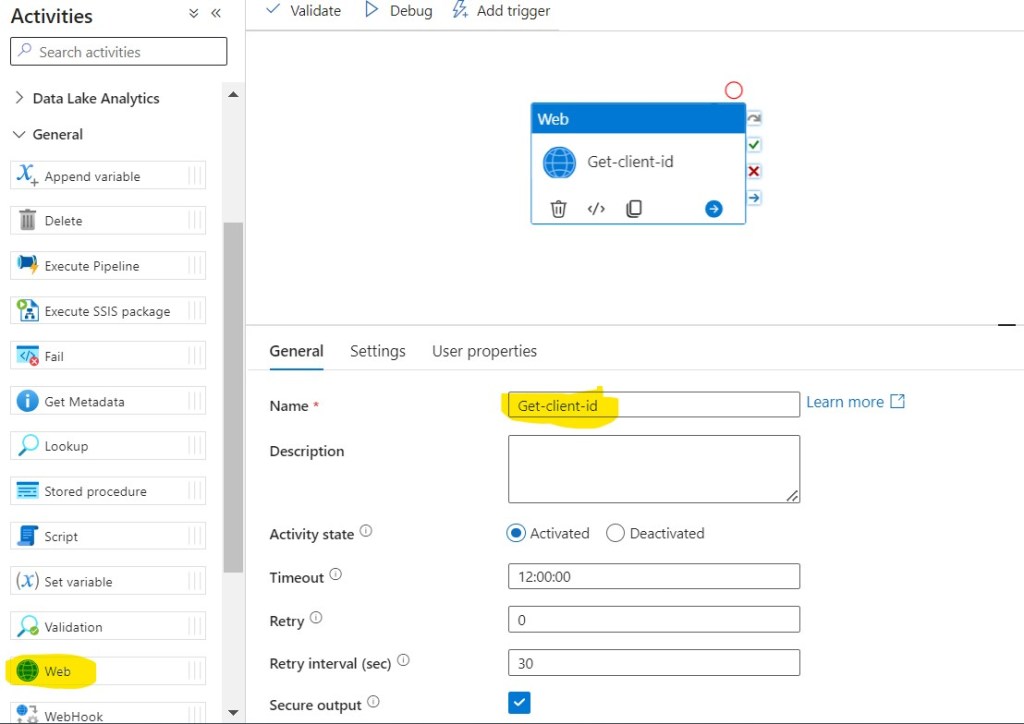
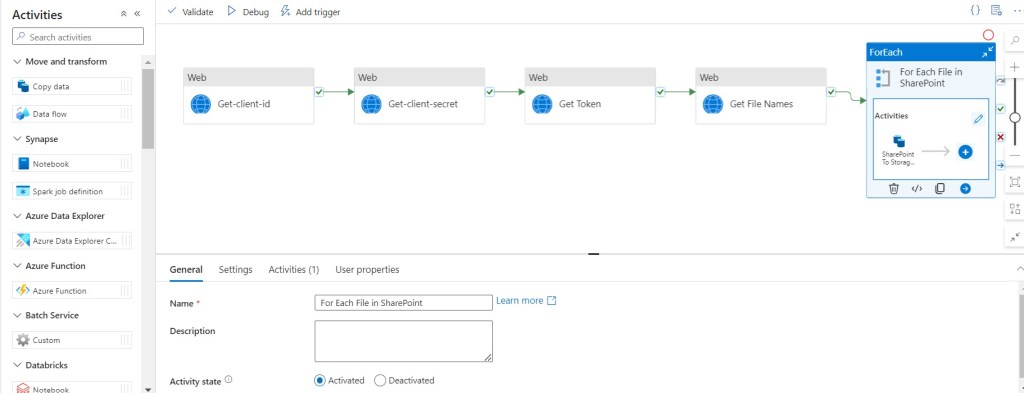
Step 24: In the Activities toolbox, expand the General category, and drag and drop the Web activity from the toolbox to the pipeline designer surface. Specify Get-client-id for Name.
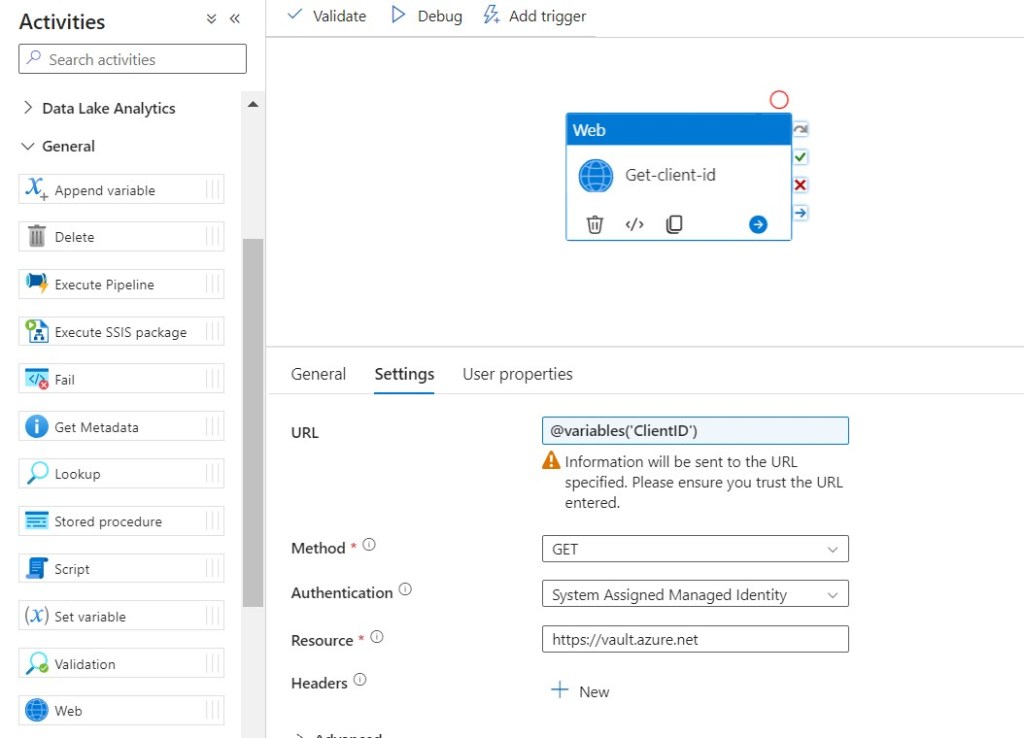
Step 25: Click on Settings, then fill required details in the Text Boxes.
- URL: @variables(‘ClientID’)
- Method: GET
- Authentication: System Assigned Managed Identity
- Resource: https://vault.azure.net
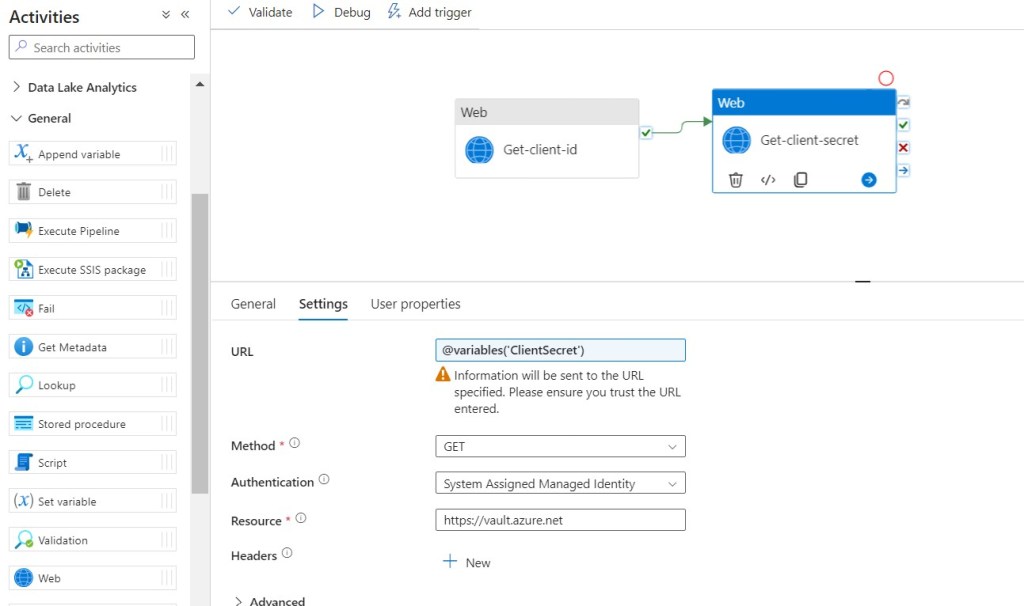
Step 26: In the Activities toolbox, expand the General category, and drag and drop the Web activity from the toolbox to the pipeline designer surface. Specify Get-client-secret for Name.

Step 27: Click on Settings, then fill required details in the Text Boxes.
- URL: @variables(‘ClientSecret’)
- Method: GET
- Authentication: System Assigned Managed Identity
- Resource: https://vault.azure.net
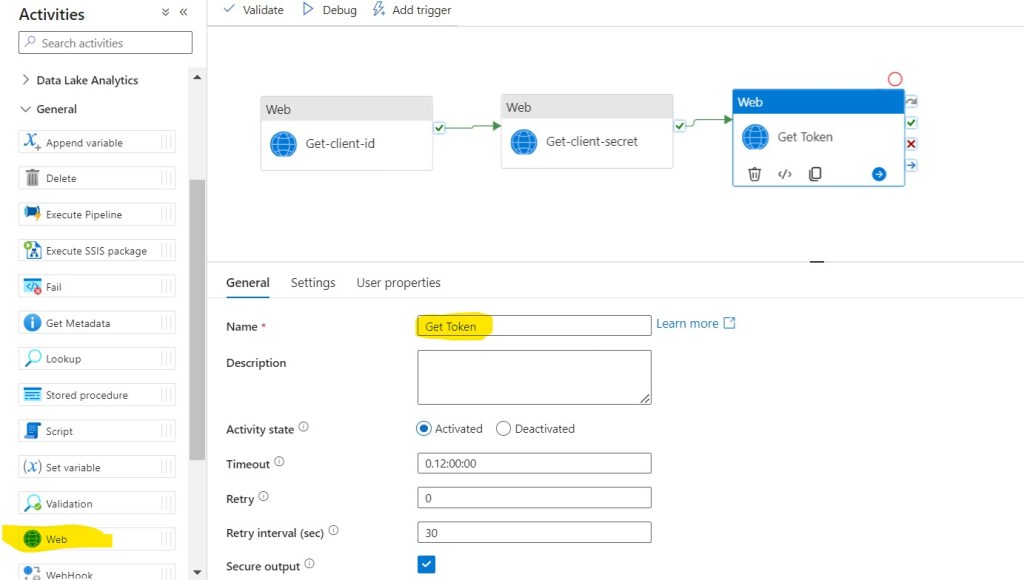
Step 28: In the Activities toolbox, expand the General category, and drag and drop the Web activity from the toolbox to the pipeline designer surface. Specify Get Token for Name.
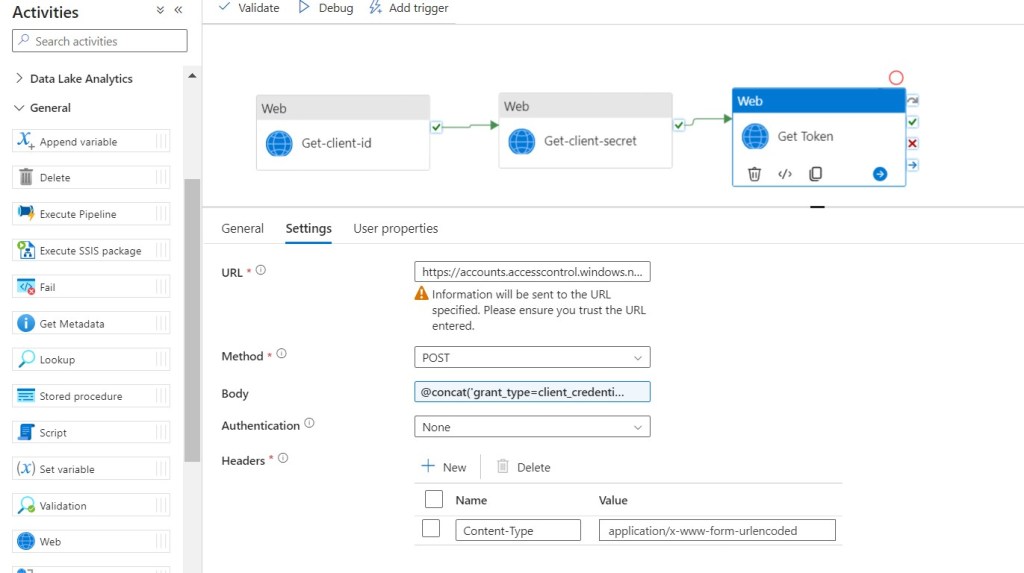
Step 29: Click on Settings, then fill required details in the Text Boxes.
- URL: https://accounts.accesscontrol.windows.net/YourTenent ID/tokens/OAuth/2
- Method: POST
- Body: @concat(‘grant_type=client_credentials&client_id=’,activity(‘Get-client-id’).output.value,’@f704ab1a-3e34-4240-bfe5-b8fce4f8d452&client_secret=’,encodeUriComponent(activity(‘Get-client-secret’).output.value),’&resource=00000003-0000-0ff1-ce00-000000000000/ization.sharepoint.com@f704ab1a-3e34-4240-bfe5-b8fce4f8d452′)
- Authentication: None
- Headers: Click + Sign near New, Add Name as Content-Type and Value as application/x-www-form-urlencoded
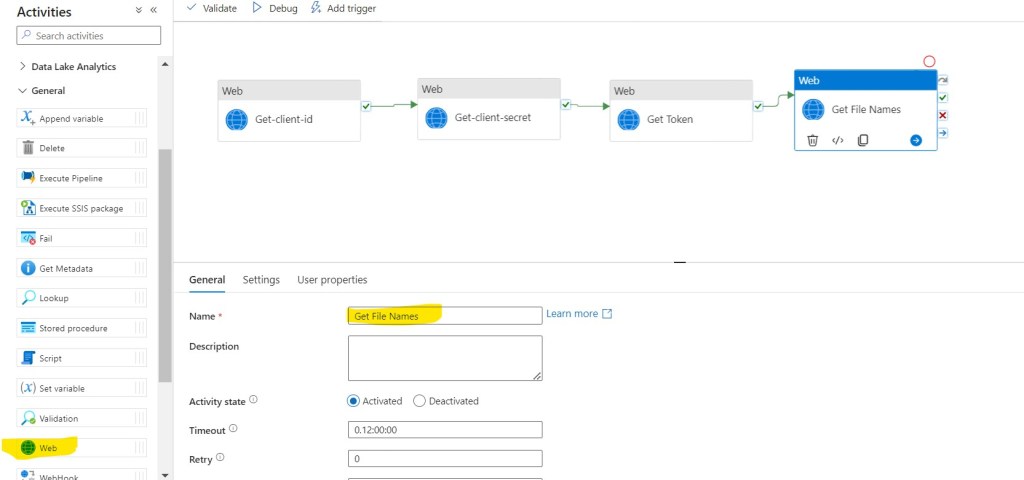
Step 30: In the Activities toolbox, expand the General category, and drag and drop the Web activity from the toolbox to the pipeline designer surface. Specify Get File Names for Name.
Step 31: Click on Settings, then fill required details in the Text Boxes.
- URL: https://ization.sharepoint.com/sites/Check/_api/web/GetFolderByServerRelativeUrl(‘Shared Documents/YourFolderName’)/Files
- Method: GET
- Authentication: None
- Headers: Click + Sign near New, Add the following :
- Name as Authorization
- Value as @{concat(‘Bearer ‘, activity(‘Get Token’).output.access_token)}
- Name as Accept
- Value as application/json
Step 32: In the Activities toolbox, expand the Iteration & conditionals category, and drag and drop the ForEach activity from the toolbox to the pipeline designer surface. Specify For Each File in SharePoint for Name.
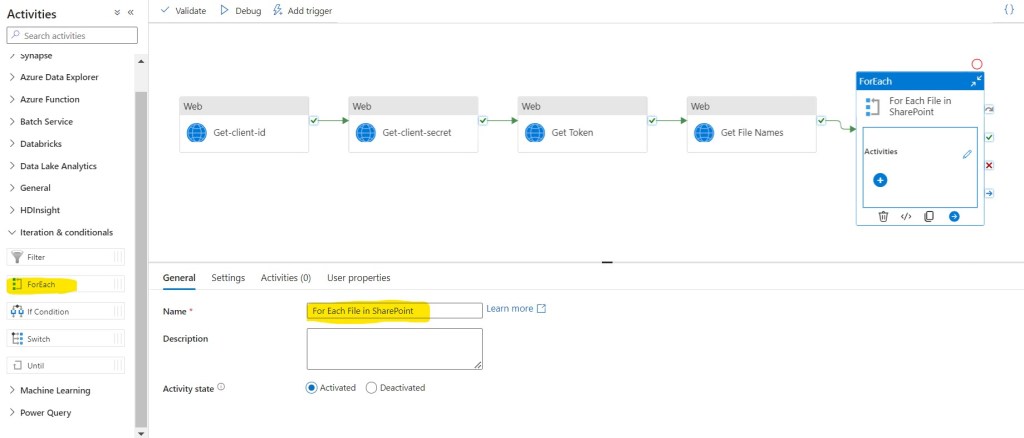
Step 33: Double click on ForEach activity.

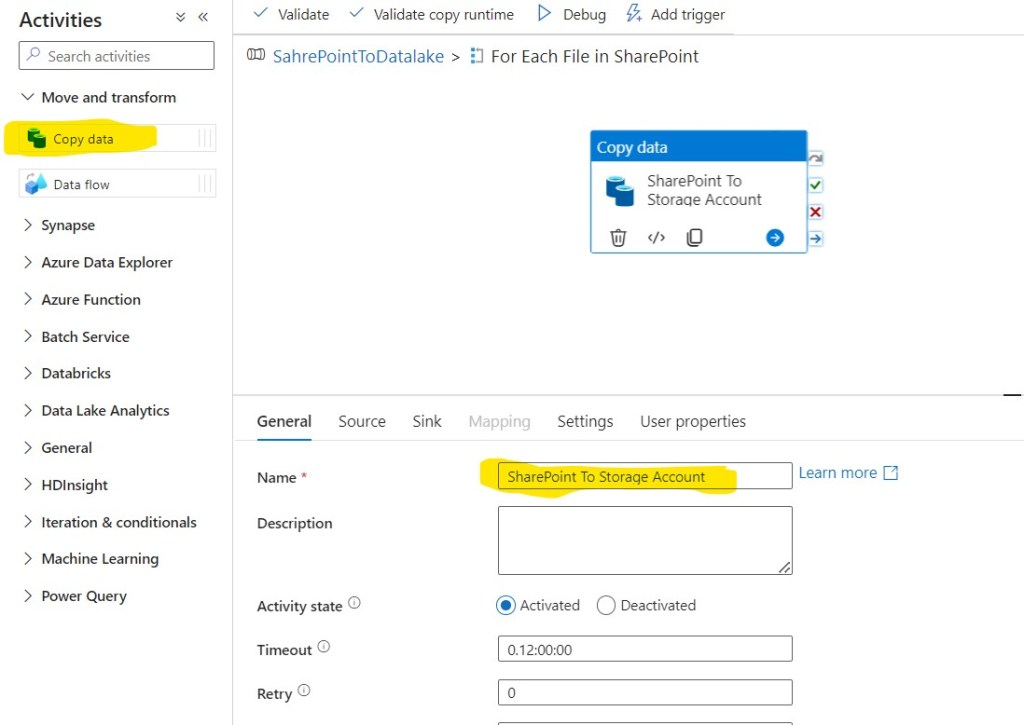
Step 34: In the Activities toolbox, expand the Move and Transform category, and drag and drop the Copy Data activity from the toolbox to the pipeline designer surface. Specify SharePoint To Storage Account for Name.
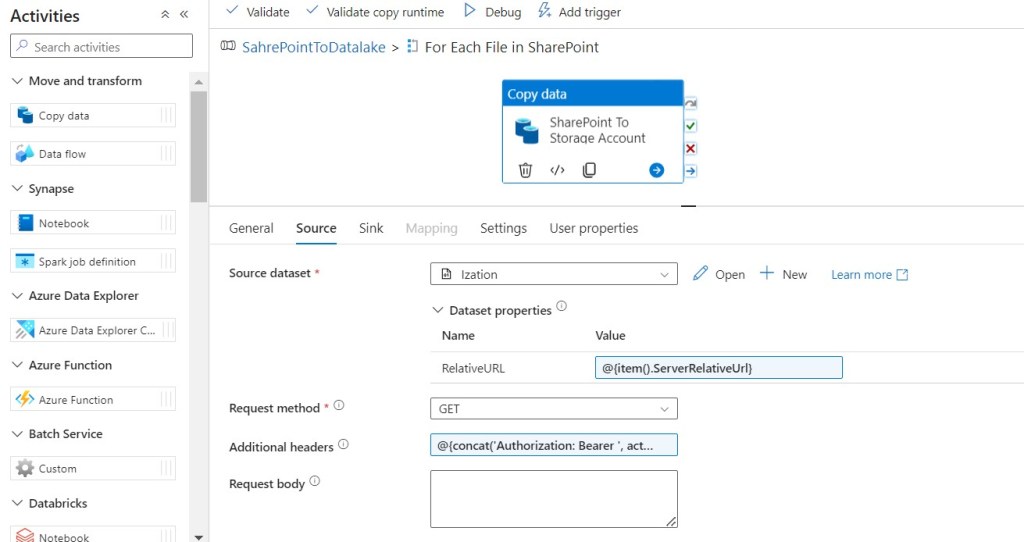
Step 35: Click on Copy data activity, go to the Source tab. Select the SharePoint dataset you created in the previous steps as Source dataset and fill in the below values:
- RelativeURL: @{item().ServerRelativeUrl}
- Request method: GET
- Additional headers: @{concat(‘Authorization: Bearer ‘, activity(‘Get Token’).output.access_token)}
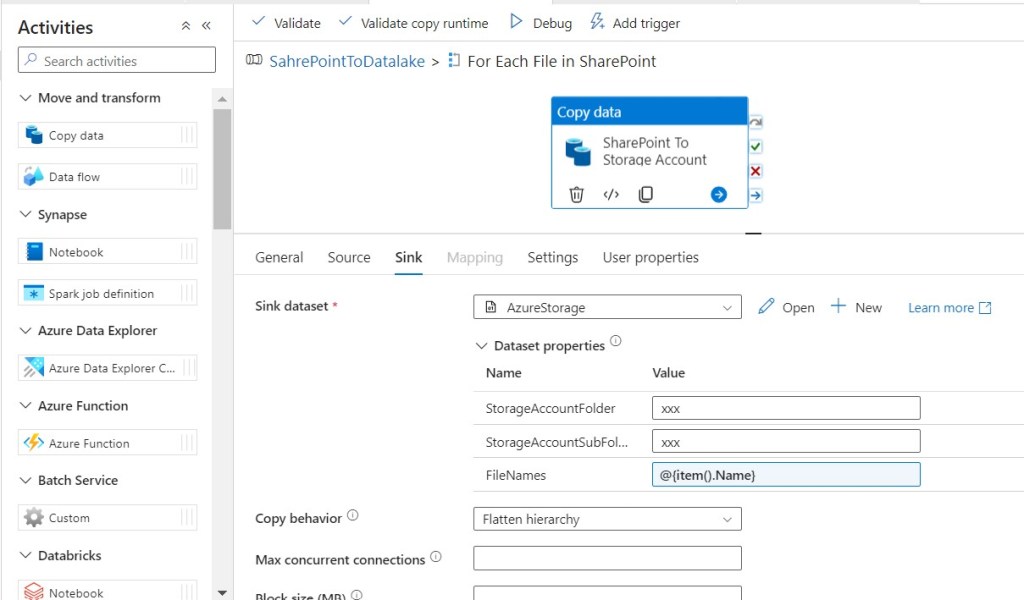
Step 36: Go to the Sink tab and Select the Datalake Gen2 dataset you created in the previous steps as Sink dataset, and fill in the below details:
- StorageAccountFolder: Storage Account Parent folder
- StorageAccountSubFolder: Storage Account Sub folder
- FileNames: @{item().Name}
Step 37: Click on SharePointToDatalake to go to the parent pipeline.

Step 38: Now your pipeline is ready, Click on Debug to check if it’s running as expected.
Step 39: Click on Publish to save your work.
With this we are done. Happy Learning.
Ready to elevate your skills? Click here for my Python book and here for my Machine Learning book on Kindle.

Leave a comment